Batomon Showdown Guides
From the first trainer pick to a planned 10-win board.
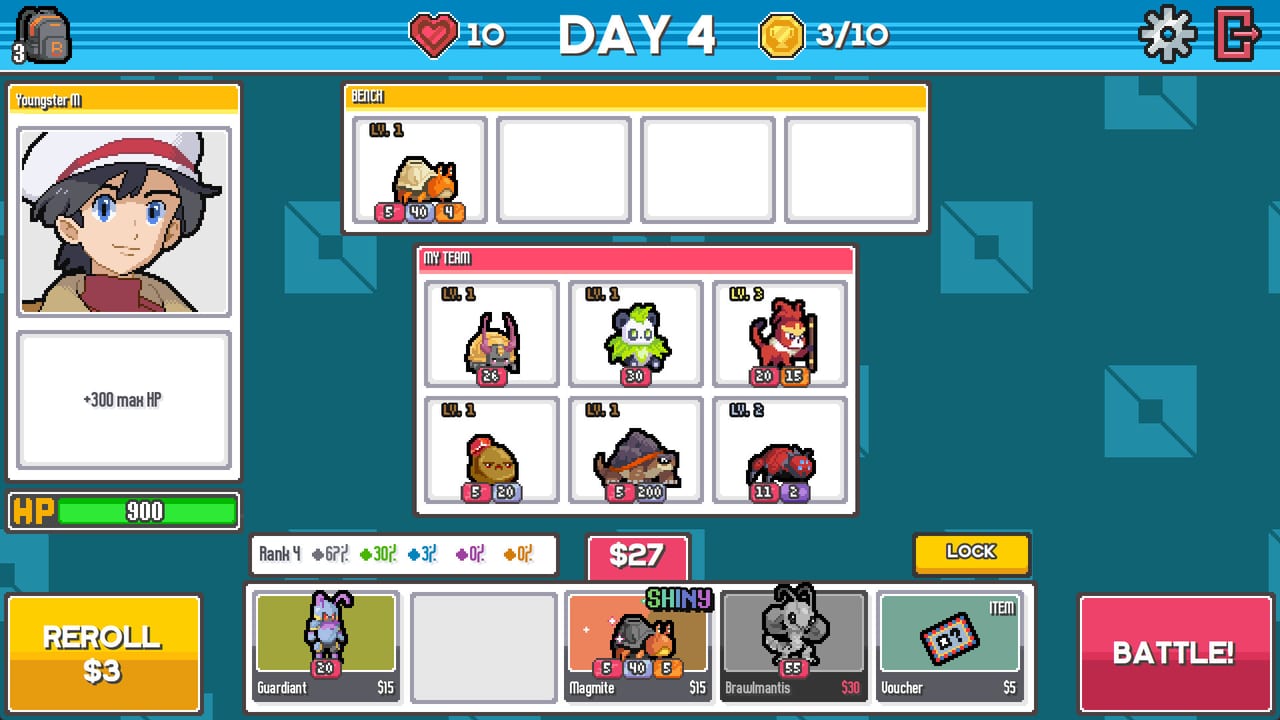
This hub is the map for every Batomon Showdown tutorial on the wiki. The game is an asynchronous auto-battler: you build in an untimed shop, then fight a saved board from the same numbered day. A normal run ends at 10 wins or when your life pool is gone after its one Second Chance. Nothing here assumes you already know Super Auto Pets, Teamfight Tactics, or creature RPGs. It assumes you opened the Steam demo or you are waiting for the September 15, 2026 launch and need a clean first-hour plan.
Start with Getting Started if you have not finished a championship yet. That page walks trainer select, the shop HUD, and the first three days. Pair it with how to play when you want the exact life table, matchmaking rules, and Second Chance timing. If the interface itself is the blocker, open controls for mouse, keyboard, controller, and the Fast Forward bar.
What a good first week looks like
You do not need the whole 88-Batomon catalog memorized. You need three habits. First, spend the untimed shop instead of mashing Battle. Second, merge on purpose: three matching level-1 copies make level 2, two matching level-2 copies make level 3 and open a trinket gift. Third, read when abilities fire. A high-damage unit that never shares a trigger with its neighbors will lose to a cheaper board that stacks On Cast, Ongoing, or On Battle Start. The shop and merging guide is the economy page; the combat guide is the trigger page.
Day 5 is the real difficulty spike. Losses cost 1 life on days 1–2, 2 lives on days 3–4, and 3 lives from day 5 onward. A run that looks healthy at 7 lives can die in two late fights. The 10-win guide is written around that breakpoint, including when to take a pivot event and when to cash a Second Chance reward instead of greed.
Build pages versus system pages
System pages teach rules that every trainer uses. Build pages teach a specific engine you can steal after you understand those rules. Use Shock builds when Electric units and Battery Pack keep showing up. Use Poison builds when Chemist or Black Sludge shows up. Use Burn builds when Chef or Redhead is the lock. Use mythical builds when a Gamer, Masked Man line, or late Mythical item appears. Use the shiny guide when a sparkle rewrites a card. Use the Level 4 guide when a candy or Mega Upgrade Disc appears. Use Extended Mode after your first championship if you want the day-40 continuation. Items and trinkets and events are the two extra shops that skip gold. Neither page replaces a comp tier list. Comps tell you which cores are actually finishing 10 wins in Balance 14; build pages tell you how those cores spend gold.
When a rule and a ranking disagree, trust the rule for your current board. Ranked matchmaking still softens some Casual and low-tier snapshots. A unit that looks broken on a Master board may be missing levels or trinkets in Bronze. Cross-check the Batomon tier list and the trainer hub before you force a Legendary you cannot support.
How these guides are structured
Each guide keeps one job. Getting Started is onboarding. How to Play is the ruleset. Controls is input. Shop and Merging is gold, lock, rank, and sell value. Combat is cooldown, status, positioning, and sudden death. Ten Wins is run planning. Shock, Poison, Burn, and Mythical pages are archetypes with a single mid-article video each. Level 4 and Extended Mode are the two extra-system pages for the cap and the continuation. We do not stack three YouTube embeds on one URL, and we do not invent video IDs. If a creator recorded the same lesson twice, only the clearer recording is embedded.
Internal links stay locale-agnostic (/guides/combat/, not /fr/guides/combat/). The generator localizes them for French, German, and Spanish. Legal pages are the exception and stay on English URLs.
What to read after the hubs
Once a system page makes sense, jump to a ranking or a tool instead of rereading the same intro. The trainer guide explains Bug Catcher, Youngster, Chef, Chemist, Monster Ranger, Shopkeeper, Swim Coach, Masked Man, Mad Scientist, Egg Breeder, and Gamer with the abilities shown in the current catalog. The team planner is a positioning and merge checklist you can keep open on a second monitor. The economy tool is a gold and reroll table. Patch notes catch Balance 14 nerfs that quietly kill last month’s screenshot comps.
If you only have twenty minutes before the next ranked search, do this: pick a trainer from beginner trainers, skim shop merging, then look at the top three cores on the comp list. Formiqueen plus commons, Berroon plus item scaling, and Plunderbird plus Water triggers are the three engines that keep showing up in recent 10-win boards. You can still win with a weird Egg Breeder line. You just need to know which fights you are allowed to lose before day 5.
This wiki is unofficial. berrymint ships the game; we only document what the Steam page, demo catalog, and public patch notes already show. When a number changes, we update the page that owns that number instead of pasting the same changelog on every URL.
Frequently Asked Questions
Quick answers to the most common questions.
Which Batomon Showdown guide should I open first?
Open Getting Started for the first run, then how to play for lives and Second Chance. Use controls only if the HUD is the problem.
Do these guides work for the September 2026 full game?
Yes for the loop. The demo taught the same shop-battle-10-wins structure. Roster size, trainers, and events expand at launch, so always re-check patch notes.
Where do build guides live versus the tier list?
Archetype pages such as Shock builds, Poison builds, and Burn builds sit here. Rankings of units and cores sit under the tier list hub.